Sunday, December 22, 2013

Happy New Year 2014 Dry Erase Chalkboard

Wow can I just say that 2013 has just flown by! This past year had some great highlights and amazing experiences.  I am looking forward to many more to come for the new year in 2014!  I love fresh starts and new beginnings and here we are about to start  a brand new year.  My goals are pretty simple and I may adjust them as the year progresses.  For me I like to mix a few simple goals with others that are also long term ones.   I love chalkboard art and I was happy to see this element included in BCD Dolls new release.  Documenting the Everyday.  I couldn't wait to use this element for my latest project! So I decided to enlarge it and laminate it so I could write on it with some fun chalkboard markers. It totally has the look of chalkboard and is easy to write on and display.
I took the element and downloaded it into Heritage Collector. If you have not yet tried out Heritage Collector you are missing out on a gem of a program! Later in this post I will share with you the links to find out more!

 I also found these fun flairs in BCD Dolls kit Always Remember. I downloaded them into Heritage Collector Storybook and then I printed them on card stock. I  thought the flairs would make a darling pair of magnets to hang the finished project on my  fridge.   If you are not inclined to put this on your fridge you can set it up on your counter top with a little easel. I have loved these fun chalkboard pens.  They are a little easier to use than regular chalk.  I love all the fun colors to choose from!
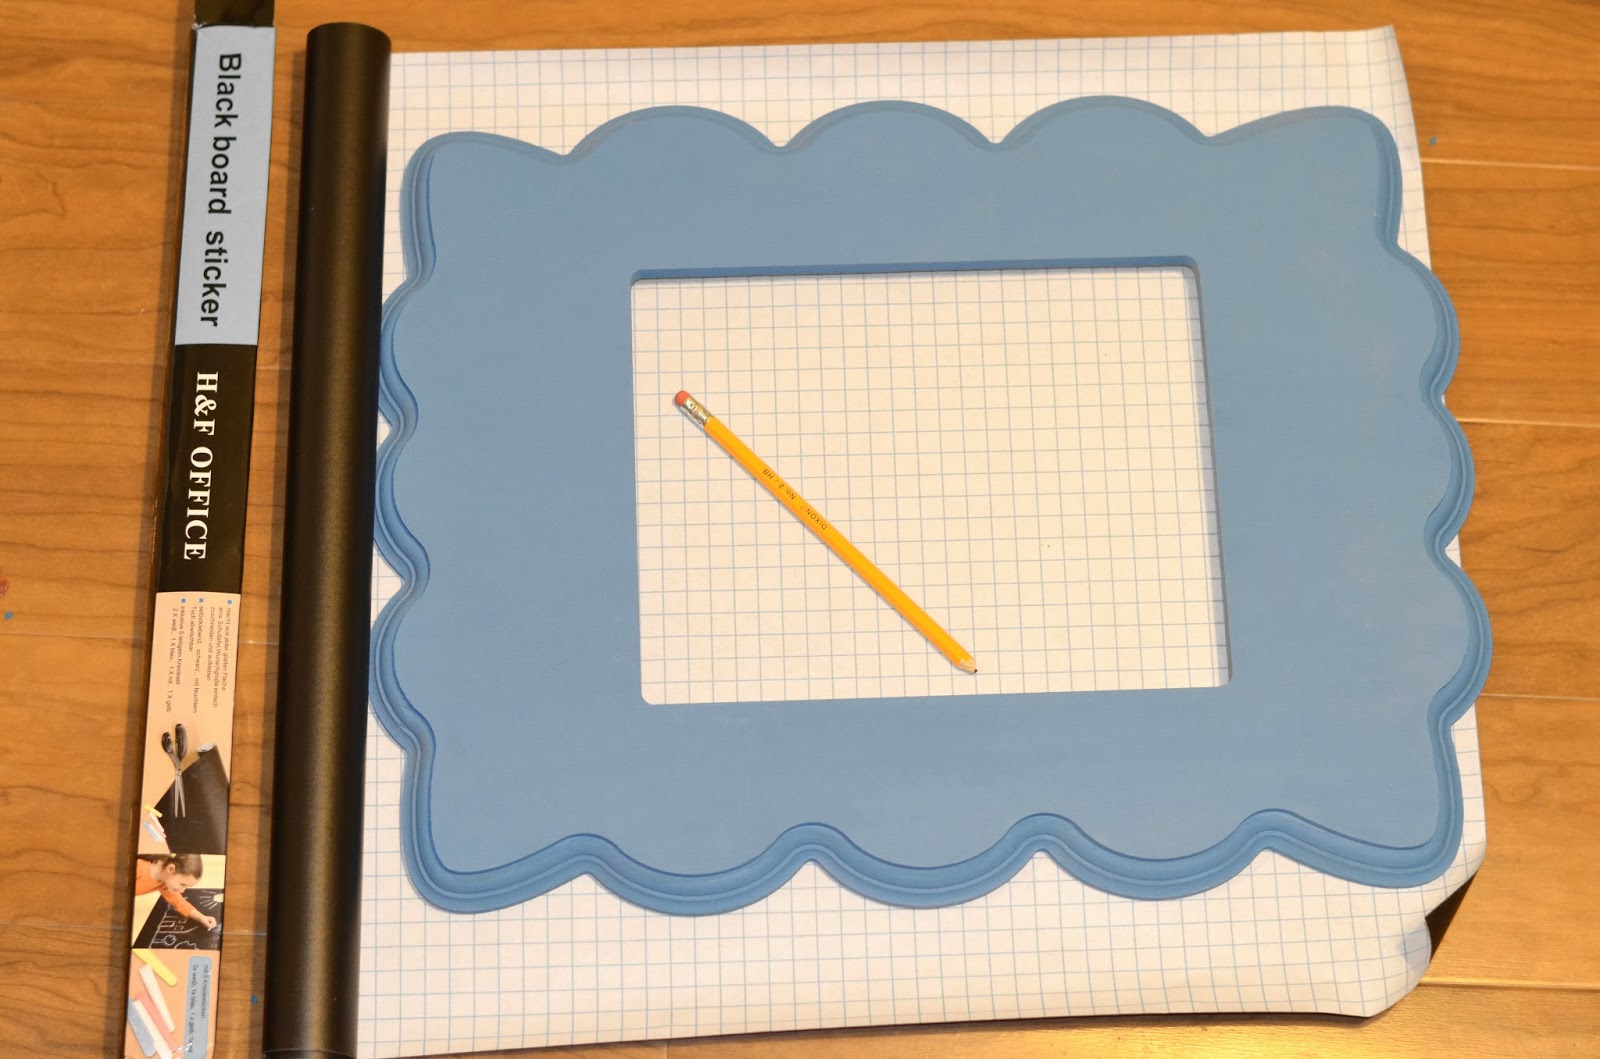
I took my 8×10 card stock print  to a copy store and had them laminate it. I cut out the flairs.  I attached the two flairs onto the round beveled glass with some clear glaze adhesive.  Once it was dry I also coated the back with a dab of tacky glue and added the magnets.   Pictured below is the second idea with the magnets for the fridge.  It is amazing what you can do once you laminate your project. If you are also looking for an awesome program to help you create some amazing projects look no further than Heritage Collector!  https://www.youtube.com/channel/UCij9En_EOhpFDnha9pwGWug
I am almost ready to begin a new year.  Now that I have an idea of some of the things  I want to do differently this year, it will be nice to have a place that reminds me of my new resolutions.  Best of all I can change it or add new ideas! Don’t forget to pick up your own copy of Documenting the Everyday so you can make your own laminated dry erase chalkboard.  Wishing you a Happy New Year! May it be your best year ever.

Friday, December 13, 2013

Vinyl Chalkboard Fridge Message Board


Ok I will admit it.  I have been a little obsessed with chalkboard lately.  I love looking at all the fun chalkboard art, cards, and framed art.  I also love chunky curved frames.  So when I saw this idea with vinyl combined with chalkboard I just had to create one for my fridge! So a few weeks ago I ordered a vinyl chalkboard sticker.  It is very similar to contact paper.


The vinyl came in a roll with some chalk included! I traced my curvy frame with a pencil to the back of the vinyl.  Then I very carefully cut it out.  I gently pulled away the backing smoothing out any bubbles and attached it to my fridge. This was really so simple to create.  What do you think?  Are you ready to make your own  vinyl message board for your fridge?

Saturday, November 30, 2013

Elf on the shelf


 This is our first official year trying out Elf on the Shelf. I was excited to make up a Christmas countdown for our first day to introduce our elf and to kick off the month of December. I put together a print and decided to add a little to it to make it a bit more festive with our elf.  I  love Christmas time and think the fun antics of our elf Noel will make the start to each day during December more enjoyable for our children.


Mini Calendar Gift Idea


I couldn't wait to show you this fun framed mini calendar!  I love a project that is simple to put together.  I  love making and receiving useful personalized gifts!  So when I came across this darling calendar kit from Boutique Cute Dolls I just had to make some mini 3×3 calendars to give as gifts this Christmas. You can never have enough calendars around the house.  I love curvy frames and chipboard.  For this tutorial I made one of each.  The chipboard obviously is less expensive to purchase.  I thought it would be great for adding magnets to the back of the chipboard and hanging on the fridge. The wood frame  would be nice to display on a desk or counter, nightstand etc.  Really anywhere that you need to have quick access to the calendar.


 The items I used  for this project were a chipboard and a wooden frame.  I chose an opening with a 3×3 size.  The calendar file shows a 6×6 size.  I shrunk mine down to fit the frames.  I painted the wood an antique white color with a sponge brush.  While the paint was drying  I printed the file out  on card stock and cut them out.


 The items you need for this project are your choice of chipboard and a wooden frame.  I chose an opening with a 3×3 size.  The calendar file shows a 6×6 size.  I shrunk mine down to fit the frames.  I painted the wood an antique white color with a sponge brush.  While the paint was drying  I printed the file out  on card stock and cut them out.   So what do you think?  Are you ready to download the 2014 calendar file and make some for Christmas gifts?  I just could not pass up on making one for my kitchen counter too! Such a fun and simple way to share a great gift!

Friday, November 1, 2013

Thanksgiving and Gratitude


The month of November is upon us. I am looking forward to Thanksgiving later this month. I enjoy this wonderful holiday spent enjoying the company of family as well as taking time to remember our many blessings.  I feel like Thanksgiving is often overlooked between the fun of Halloween and the joy of Christmas.  So this year I decided that as a family we would make more of an effort to focus on all of the blessings we have been given.  I still have young children at home that would enjoy this project.


As I was brainstorming some ideas to accomplish this goal. I decided that each day during the month of November that we would add a "thankful leaf" to our tree.  I thought of this idea back in early October as I was looking around at a wood craft shop.  I was delighted to find a craft kit called the Thankful Tree.


Included in the kit was a wooden tree, heart cutouts and some vinyl lettering.  I printed out a 12x12 pattern paper from Boutique Cute dolls blessings kit along with some leaves. I thought the colors of the paper were lovely and would be perfect for a fall tree. I painted the tree trunk brown and the two hearts an off white color.  Then I traced the paper to fit the tree and glued it to the back of the wood.  I printed and cut out the leaves with items our family is grateful for. 


This was such a fun project to create.  I am excited to display and fill up this tree with all of our blessings and  the many things we are grateful for.  I am so blessed with a wonderful husband, beautiful children and cherished parents, brothers and sisters, grandparents, aunts, uncles and cousins.  Family means the world to me. As well as good friends. I hope you enjoyed this project and you will also take the time this month to appreciate your many blessings!


Friday, October 4, 2013

Falling leaves and Sweater Weather


Autumn is my all time favorite season!  I love the cooler nights after a long hot summer.  It is so nice to pull out some comfy sweaters, my favorite slippers, and a mug of pumpkin spice hot chocolate.  I also love to plug in some scented pumpkin to fill the whole house.  Of course once I get started with the season I need a fun print to frame for my house as well.  So I was so happy to see Nature's Best by Boutique cute dolls. 


So I pulled in some of the leaf elements from Nature's Best kit as well as some branches and leaves elements from the Be Thankful kit. I really like using a program called Heritage Collector Storybook to design and store my graphics kits.


I am also a font collector and  I thought the swirly Albemarle swash font I chose for the text worked perfectly. This was so fun to make and I am excited to frame and display this 8x10 print in my home! Are you ready to design your own? Or make one up to share as a gift!


Sunday, September 1, 2013

Framed 2014 Calendar


Christmas will soon be here!  I know it's only the beginning of September.  But I couldn't wait to share this project.  I love having a calendar and have several in my kitchen.  I wanted to have a mini one for my counter top.  My main reason for this project was to make some to give as Christmas gifts this year. I have learned over the year's that the best time to put together a gift is not during the month of December.  In the early fall I have more time to plan and design something for Christmas.

I began with with an unfinished wood frame.  Once the frames were painted.  I used a calendar file that my sister generously loaned to me that she had designed in Heritage Collector Storybook. The tutorial for the calendar can be found on her blog.  http://heritagecollectorstorybook.blogspot.com/ The finished dimensions turned out to by 3x4 for mini calendar when cut out.  It fit great for this mini curved frame.  I attached the print with double sided tape to each of the 12 pages.  I will post more pictures soon of how I put together this project!

Wishing you a wonderful day with a great thought!


Saturday, August 17, 2013

Custom Mousepads


I had so much fun putting these custom mouse pads together!  So many different directions you could go with this project. Don't you think these would make a fun personalized gift?  Most everyone I know uses a computer. So I figured that these would be fun to personalize. These are really quite simple to create and depending on if you like to sew or use glue you can easily make one of these for yourself or a friend.  Once I had gathered all my supplies it literally only took 10 minutes to make one of these!   To make the fabric mouse pad all you need  to do is decide what you want your finished size to be.  I chose 10x8.  I cut out 2 pieces of fabric in that size along with a piece of felt, or medium fusible webbing.  I put wrong sides together with the felt or webbing inside and sewed a 1/4 inch seam. I left a 3 inch opening to pull the fabric  right side out. I then hand stitched that opening closed and I was finished! You could easily sew a decorative stitch along the edge for a fun look as well.


This second one was my favorite to put together. I think this would be great for my husband to use at the office. I also thought these would be fun to make for each of my brothers and sisters this Christmas. For my mouse pad  I designed it in Heritage Collector Storybook in a 10x8.  I used some elements from Boutique Cute Dolls along the bottom of the page.


This third idea was from Boutique Cute Dolls Springtime kit.  I love the bright pattern of the paper.  I also printed it on photo paper in a 10x8 size.  I think this would be a great gift idea for a few friends.


For this project the materials you will need are: Craft foam,  modge podge,  polyurethane, and a foam brush.  I also used a corner punch but you are welcome to leave the corners square if you wish.  I cut the craft foam to fit my print.  Then I put a few coats of modge podge on the foam and then carefully put my print on the glued side.  I smoothed the paper onto the glue a few times to make sure it was firmly attached and that there were no air bubbles.  I waited about 5 minutes and then sprayed the photo print with a couple of coats of the polyurethane.  You could also laminate your photo paper and attach with the glue.  Or contact paper would also work as well to protect the photo finish.


Thursday, June 20, 2013

Summer Fun


Summer is in full swing at our house. Lazy summer days.  Trips to the river and the pool. Friends coming and going.  Never ending snow cones, ice cream and pop sickles. Night games and movie nights with popcorn. Camping, trips to the beach, road trips in the car. Oh to be a kid again.  Mom keeps it all together with  the fridge fully stocked and the laundry going to clean the never ending towels and swimsuits. The reality is that it's not all fun for Mom. Don't get me wrong I love summer too.  During all the chaos and trying to keep things going I have forgotten a few times to keep the battery in my camera fully charged. I really need to get a backup battery! Sometimes we forget something important like sunscreen.  Or I have grumpy kids from too many late nights.  But through it all one of my favorite things to do during the summer is to capture all those fun times on film. I get to follow my kids around join in the fun and hopefully catch a moment or two on camera!


It's fun for my family to look back at all the great times we had during the break.  This is my journal keeping in a nutshell.  I am not very good at writing day to day, but I really enjoy putting together a page and jotting down some of my thoughts about the pictures on display. I think my kids enjoy looking at them too.


Most of the pages I create are 12x12 size.  I love using Heritage Collector Storybook to create the layouts.  Most of the graphics came from Cool Summer, Sweet summer, and All about Boy kits.


I am also sharing these two summer adventures from Deena Rutter too. 


Camping fun


I love summer!  One of the things I enjoy is scrapping all the fun things we do during our break.  It's a great time to enjoy each other and make some great memories!  I use to hand scrap each page.  Until I discovered digital scrap booking a few years ago.  I will never go back.  I still enjoy making a handmade card or tag.  But I love all the fun things you can do with digital graphic kits.  I think it's great that I can use the graphics over and over.  As well as make as many changes to my page as I want!  Which I usually do a few drafts before I even print the page.  I used the camping kit from Jessica Sprauge. Of course I couldn't create these without  Heritage Collector storybook.


So this post is all about summer.  My family is going on a camping trip to Bear Lake soon.  I put together a camping kit for each one of my children to use on the trip.  I created a laminated digital page that doubles as a white board that they can doodle on.  I slipped each one into a bag with a dry erase pen, and some snacks for the trip. I think we will use these for next summers activities too.


I designed each of these pages as 8 1/2 x 11.  I printed them on card stock and then laminated each one.  I love that you can use each one as doodle page when you flip it over.  I think they will work great to pass the time drawing while driving in the car.  If I were to do these again though I would size mine to an 8x10 because it is a tight squeeze into a gallon ziplock bag.

 My kids seem to like them and it will keep their own stuff marked and labeled with their name.  Can't wait to add some mini flashlights and glow sticks to their bags.  These were really fun to put together and build some excitement for our upcoming camping trip!

Monday, May 27, 2013

DIY Chalkboard Quotes


I have been wanting to try out some chalkboard prints with Heritage Collector Storybook for awhile.  I finally got around to making some up today.  There are a lot of great fonts that pair well with the chalkboard background.  I could have designed the background entirely as a chalkboard effect.  I decided I needed a little color though.


This was really simple to create.  I looked through some of the kits that I had purchased and located some brushed effects.  Believe it on not the flowers I used here were originally in bright colors or black.  I changed the color to white.  I chose to use two free fonts called EcuyerDax, and  DK Claire de lune.  I thought the effect was just about right.


This second print is basically the same.  I just chose to use one less flower and a blue background instead. You can try just about anything with a chalk print.  I love being able to easily move elements and backgrounds around to see what works best.  One of the best parts about digital scrap booking!


For the print above I decided to add a little more color and a different font.  I used DK Claire de lune for this one. As well as the kit Happier by Deena Rutter. I thought the colors were fun bright colors to go along with the theme of the message here.  I love being able to print up my own personalized art for a gift.  A print for the kitchen or even a card for a friend. So many possibilities can be used with these prints!


My daughter has been begging me to paint a wall of her bedroom with chalkboard paint. After making these and discovering all of the fun possibilities with this look I may just move onto a chalkboard painting project next!

These last two  are not chalkboard style but I just had to add them! I thought the graphics went well with the messages of these prints.


Tuesday, May 21, 2013

Teacher Thank You Gift


It is the end of the school year here in Utah.  My kids are getting so excited for summer!  It can be a challenge for them to continue to attend school when all they want to do is play with friends.  Or  go play outside and enjoy the sunny weather. I am sure that their teachers are also looking forward to summer vacation as well.


So I began thinking of ways we could thank my children's wonderful teachers for a great year.  I decided to keep with a summer time theme.  I chose this super fun kit Lemonade Stand from Daisy's and Dimples.  They have some great digital scrap booking kits to choose from. I have attached the link.

http://daisiesanddimples.com/index.php?main_page=product_info&products_id=2044:e00a8f60fc5268ff9623f0510c09d4f4

I thought the lemonade theme went perfectly with relaxing summer days.  So I downloaded the kit and designed some cards.  I thought they turned out perfect.  I picked up some plastic cups and some lemonade packets from my local store.  I then added a card.  The dimensions are 4 inches by 11  inches.  I then folded it and I slipped a gift card inside.


While I was thinking about lemonade I picked up a large jar of simply lemonade and made another card and attached it to the jar with some fun paper straws. The card dimension were 4x8 inches.


I picked up the straws at my local Partyland store.  Hobby Lobby also stocks them.  I thought the lemon tag went great with the lemonade jar. You could also attach a gift card inside


I decided to make up a batch of lemonade cupcakes. I picked up a Betty Crocker Lemon flavored cake mix. While the cupcakes were baking. I used one of the fun elements from the Lemonade Stand digi kit to design a card for the cupcake. Then I printed out a polka dot paper from the collection. You can get free cupcake topper printables here. I added a decorative edge with some craft scissors and  wrapped the paper around the cupcake liner and dropped it inside a plastic cup.


 The finishing touches were a lemon candy for the cupcake.  Cellophane and a clear tied bow and the card.


Below is a fun lightly lemon flavored frosting recipe for you to try!  I found some coordinating papers and lemon elements from the Lemonade Stand kit to put this together.  Heritage Storybook made it super easy to arrange the cards and elements  Enjoy!  Summer will soon be here.