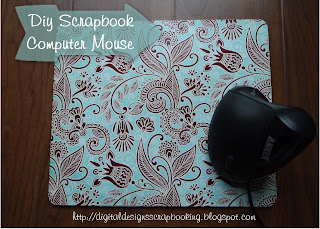
I had so much fun putting these custom mouse pads together! So many different directions you could go with this project. Don't you think these would make a fun personalized gift? Most everyone I know uses a computer. So I figured that these would be fun to personalize. These are really quite simple to create and depending on if you like to sew or use glue you can easily make one of these for yourself or a friend. Once I had gathered all my supplies it literally only took 10 minutes to make one of these! To make the fabric mouse pad all you need to do is decide what you want your finished size to be. I chose 10x8. I cut out 2 pieces of fabric in that size along with a piece of felt, or medium fusible webbing. I put wrong sides together with the felt or webbing inside and sewed a 1/4 inch seam. I left a 3 inch opening to pull the fabric right side out. I then hand stitched that opening closed and I was finished! You could easily sew a decorative stitch along the edge for a fun look as well.
This second one was my favorite to put together. I think this would be great for my husband to use at the office. I also thought these would be fun to make for each of my brothers and sisters this Christmas. For my mouse pad I designed it in Heritage Collector Storybook in a 10x8. I used some elements from Boutique Cute Dolls along the bottom of the page.
For this project the materials you will need are: Craft foam, modge podge, polyurethane, and a foam brush. I also used a corner punch but you are welcome to leave the corners square if you wish. I cut the craft foam to fit my print. Then I put a few coats of modge podge on the foam and then carefully put my print on the glued side. I smoothed the paper onto the glue a few times to make sure it was firmly attached and that there were no air bubbles. I waited about 5 minutes and then sprayed the photo print with a couple of coats of the polyurethane. You could also laminate your photo paper and attach with the glue. Or contact paper would also work as well to protect the photo finish.


